We have discussed the elimination of edge darkening aka vignetting earlier. This optical aberration if mainly experienced as a darkening of a smaller or larger extent in the corners of photos taken with a wide-angle lens. This time, however, we won’t write about decreasing this effect. Quite on the contrary, we’ll try to spoil a healthy picture with a bit of artificial vignette. Why should one do that? This interesting effect can sometimes help you emphasize the main theme of the picture, for example in a portrait or an object photo. Don’t be afraid! It won’t hurt a bit.
Step 1: Open the photo
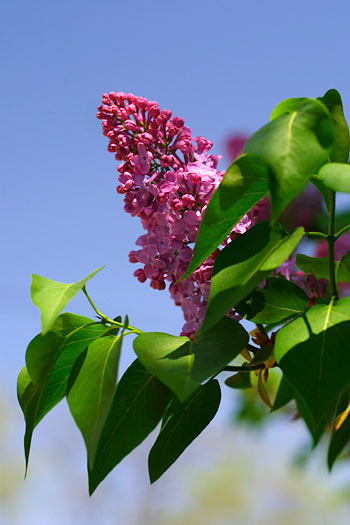
This is the photo we will add dark corners to, in order to highlight the theme in the middle.
Step 2: Oval selection
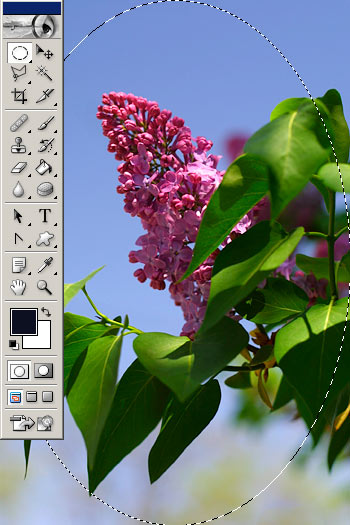
First, select the Elliptical Marquee Tool. Drag a marquee from the upper left corner to the lower right. It will cover the whole of the picture, apart from the corners.
The middle of the picture is selected right now, but we’ll need to manipulate the corners. Right-click inside the selection and click Select Inverse in order to swap the selected areas.
Step 3: Putting a mask on
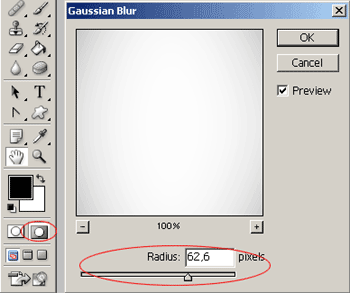
Click the indicated button on the Tools palette or press Q to display the selection mask. The areas marked in red are masked out. They won’t be affected by the changes you make. The unmasked areas are affected by all changes. As we want a soft edge darkening effect, and the contour of the selection is obviously sharp, we’ll have to blur it. You can do this just like when blurring any other picture element. Simply click Filter/Blur/Gaussian Blur and set a moderate to high value on the dialog. We used a value of about 61 to 62. For a sharper transition, use a lower Radius value. For a softer one, set it higher.
The blur will only affect the mask, not the picture. At least, not yet. Press Q again when you’re done to quit the Quick Mask mode. The picture once again becomes editable.
Step 4: Dark edges
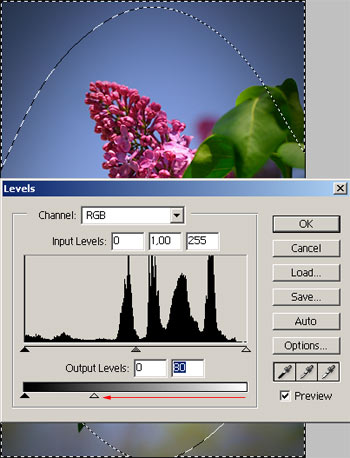
Take care to not click the picture! Doing so cancels the selection and resets all the work you have done until now. Click Image/Adjustments/Levels instead, and drag the indicated arrow to the left on the dialog that is displayed. The more you drag it to the left, the darker the corners will become. Set the vignette effect according to your taste.
Step 5: The effect…
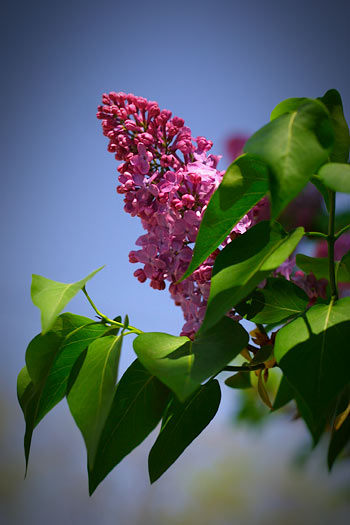
…is surely visible. Do we need to say more? Have fun trying around!