For the third time, we take a look at undoing. This time, we’ll discuss non-linear undo that can make editing work much easier and faster, and perhaps it can offer new possibilities in retouching your photos.What is this strangely named procedure anyway? It is slightly similar to the “alternative timeline” you may know from science fiction movies.You can separately return to steps or commands carried out earlier and can apply them to the photo on a different timeline, at the same time. It may sound a bit complicated, but in practice it is simpler.
Load the photo in Photoshop
We’ll apply two different effects to the picture, one after the other. Then we’ll return to the original state and paint back the effects to certain areas of the photo.
If you’re not very self-assured about using the History palette, read the two articles we published earlier about undo.
Before you begin…

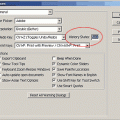
First of all, you have to activate History Options in the upper right corner of the History palette, and select Allow Non-Linear History.
By default, returning to a step stored on the History palette makes you lose all the steps that followed that particular one and continue editing from that previous state.
By enabling non-linear undo, you may return to any step you choose without losing those you made afterwards.
The road is open

You can make any changes, effects, commands, and return separately to each of them.
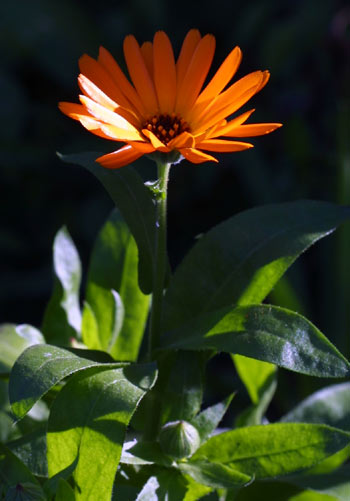
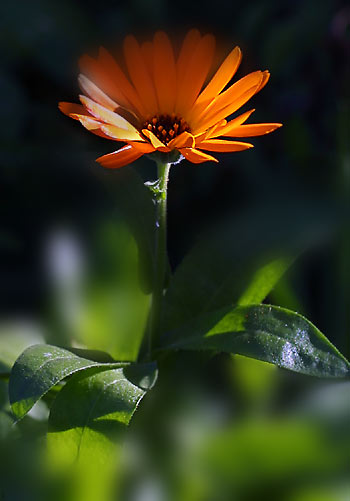
In this example, we did an Unsharp Mask sharpening and a Gaussian Blur to the photo.
Now select the original state of the picture to return to that state. Put the Undo icon beside the first step (in this case, Unsharp Mask).
You can also click File/Revert to return to the original.
Now select the History Brush tool (or press Y) and a brush size you think appropriate, and paint back the sharpening effect to the areas you want.
Come back!

When you’re done, put the undo icon beside Gaussian Blur, and change the brush size if you see fit. Now paint over the areas you want to see blurred.
This way, the picture will be the mixture of the two different states: some parts will have sharpening painted over, while others, blurring.
We applied one effect after the other, which means, they could have been made to affect just the desired parts only with a more tedious masking technique.
A universal tool
Applying non-linear undoing is indeed limited by your creativity only. Or not even by that.
For example, you can apply lightening to the photo with different strengths, and then return to the original state to paint over various areas with different exposure values. You can also change the colors multiple times, and paint back the different color states.
You may also apply multi-step sharpening and bring back edges of different strength, etc., etc.
You simply cannot recite all the possibilities. Non-linear undoing is a really universal tool in editing work.