We have already discussed the darkening of picture edges and corners several times. We tried to eliminate this effect, and there were also times we conjured it upon a photo. Once again, we’re up to the latter. By darkening the corners of the image, you can nicely emphasize the more important themes in the middle, and simply make other parts inessential at the same time, while still leaving all the picture elements visible.
Load the photo in Photoshop
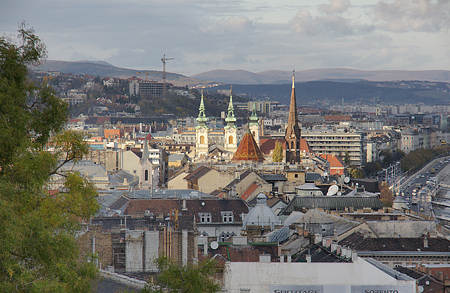
The emphasizing of the main theme by darkening the corners of the image can be the most effective when dealing with crowded pictures containing a lot of elements. This time, natural lights helped us a lot as they also bring out the middle areas. Let’s make it double and accentuate this effect by darkening the corners!
Get those lamps!
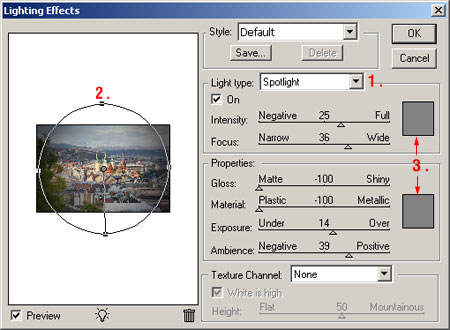
Our primary tool is the Filter/Render/Lighting Effects menu item. This feature basically directs light sources, e.g. spotlights, of any color and luminance to specified areas of the picture.
First, select Spotlight from the Light Type dropdown. Second, resize the light circle on the left-side preview as needed. You can see four handles on the circle. Drag them to resize. Hold Shift while dragging to resize the circle equally in all directions.
The third step of your preparations is to specify the light color to use. As we don’t want to change the essential light levels of the picture, it is recommended to use mid-grey for both color fields.
Outside the spotlight

We set the spot size so that the edges and corners of the picture are left out. No light falls on them. The effect strength can be controlled mainly using the four sliders indicated above. Intensity controls the strength of the light. Focus sets the size of the transition between the edge of the spotlight and the unlit areas. High values produce short transitions while lower values bring longer ones. You should select a mid-range value.
Gloss and Material have no importance now, you can safely set both to the minimum.
Exposure controls the lightness of the picture, including the unlit areas as well. Finally, Ambience specifies the blackness of the edges. Set the sliders so that the lightness levels of the middle areas generally stay unchanged, and the edges darken with a relatively long transition. You don’t need to make the corners all black. Darkening itself makes a very good frame to emphasize the content in the center.
In the tube
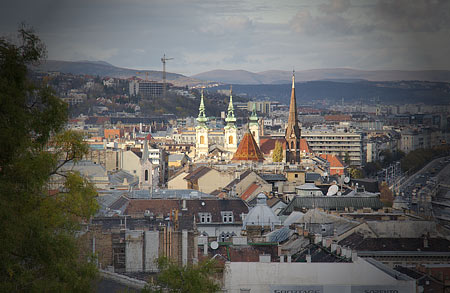
The final result shows nicely that, although the image content in the corners remains visible, the lights still direct attention to the center, and the crowded corners become of secondary importance. As if you’d be using a looking-glass.