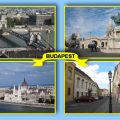
We received many requests about copying several pictures onto the same canvas. We thought the best purpose for such a thing would be to create a picture postcard, as it is the most obvious way of utilization for the technique. In the first part, we’re only introducing the method of copying multiple pictures onto the same canvas so that people who are only interested in this can acquire the Sacred Knowledge quickly.
Part II of the tip will show how the postcard gets its final form.
New document
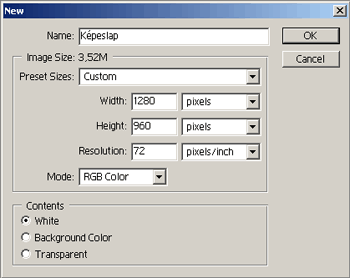
Open a new canvas for the pictures. This is where you will place the pieces. Enter a Name for the file (say, Postcard), and specify Width and Height of the canvas. If you plan to view the file on a monitor, set Resolution to 72. For printing, set it to 300.
Contents refers to the background of the empty canvas. White is obvious. Background Color uses the specified secondary (background) color. A Transparent background is represented by a checkered surface. As the JPG format doesn’t support transparency, such a setting will be lost when you save the picture. For now, you should select White.
Load the first image

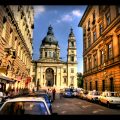
Click File/Open to load an image. Select one of those you want to place on the postcard. When the picture opens, press Ctrl+A to select the whole image. A selection marquee appears on the edges. Press Ctrl+C top copy the whole image to the clipboard.
Click the canvas called Postcard and press Ctrl+V to paste the previously copied image onto the canvas.
Ready-made sizes
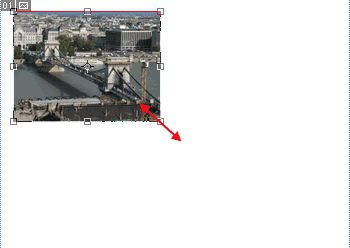
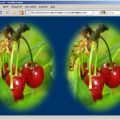
If the picture was larger than the empty canvas, only a part will be displayed. In such a case, select an appropriate zoom level on the Navigator palette (top right). Now press Ctrl+T. This selects the whole image—even the parts not displayed. The image component is ready for resizing. Press and hold Shiftand drag a corner handle to set the size you want. Since we want to place 4 pictures on the postcard, we aligned the first slice into the top left quarter of the canvas. Holding Shift while resizing preserves the original aspect ratio of the picture. Without this, you can resize the image freely, but most likely you’ll get a distorted, cramped result.
By repeating steps 2 and 3 paste and resize each of the remaining components.
It’s easier with guidelines
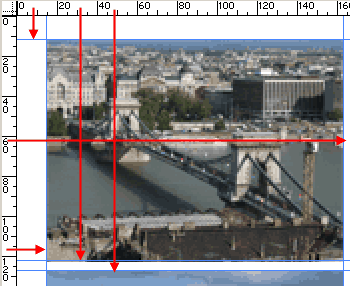
We have already discussed guidelines in earlier articles. The make the alignment of objects (picture parts) easier.
You can drag them onto the canvas from the rulers on the left and at the top (vertical and horizontal ones, respectively). Simply click the ruler and drag the mouse to place a guideline to the area you want. Release the mouse button to place the line. If the rulers are not displayed, press Ctrl+R to toggle them on.
Use the Move tool (press V) or the arrow keys to move the picture components on the canvas. First, click the layer of the desired component on the Layers palette. Accurate alignment is much easier when using guidelines. Press Ctrl+; to hide the lines.
Half finished

You have placed the pictures beside each other. If you only wanted to learn this technique, we hope we could help.
However, we’ll carry on prettifying (uglifying?) our postcard to make it look more like a real one.