Polar filter is a real evergreen. We are inclined to spend dozens, or even more than a hundred of dollars on a small piece of glass so that our photos sport livelier colors and our landscapes show deep blue skies. But you don’t absolutely have to buy such a thing. Photoshop can be the poor man’s polar filter as it can be used to emulate an effect similar to that of those expensive pieces of glass. Of course, the original effect of polar filters – the reduction of reflections and glitters – is not possible this way. If this is your purpose, you’ll have to buy one. For all the others, the article can help.
Load the photo in Photoshop

You have forgotten to attach the polar, or you don’t have one and it could come handy? Only a few steps, and… mmm, just like the real thing.
First of all
…the usual introductory step: duplicating the original layer. Click the duplication icon on the Layers palette, or click Layer/Duplicate Layer in the menu.
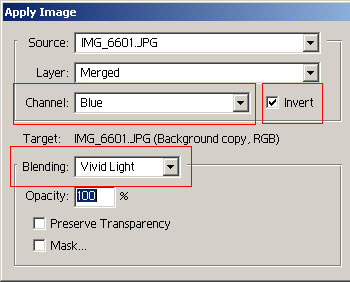
For the modification of colors, you’ll be using the all-purpose general tool of special color effects, the Image/Apply Image command. Make three changes on the dialog. Under Channel, select Blue and click Invert. Set Blending to Vivid Light.
Overlay
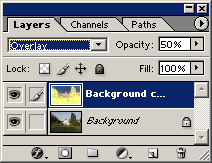
The copy layer now displays a very strangely colored picture. You’ll have to merge it with the original background layer. Set the blending mode from Normal to Overlay, and in order to reduce the strong color effect, set Opacity to about 50%. For a stronger polar effect, use a higher value. For an even weaker one, decrease it.
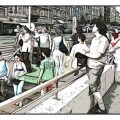
Polar
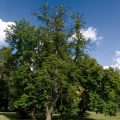
The colors of the photo now remind much more of polar filtered ones than the original. Our single foe is the increased color noise, which will only be really noticeable by large-scale zooming. Therefore, take care with Opacity.