Autumn is coming, evenings get longer, and night-time digital photos come into fashion again. The demand for star filters is on the rise, but hold on for a while! A conscious and smart DigiRetus reader doesn’t run headlong to the next photo store to get the priceless piece of glass. Instead, she rather takes the time to do the whole thing in Photoshop. Read on to learn how.
Load the photo in Photoshop
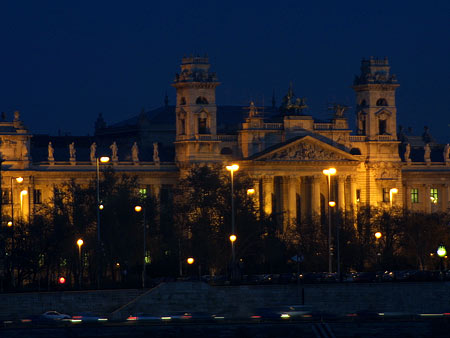
Be sure to choose a dark, evening shot with strong, point-like light sources, e.g. street lamps. This means the ideal ground for a star filter is the world of night-time city and building photos.
Making it double as usual
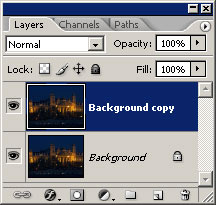
Click Layer/Duplicate Layer to create a copy of your original layer, or drag the Background layer onto the second icon from the right at the bottom of the Layers palette instead.
Now you have a Background Copy layer. This is where you will create the star-like glints without changing the original picture.
Just the light circles
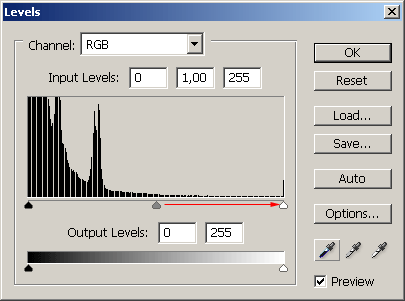
So you are now on the new Background Copy layer, of which you will only need the light spots. Click Image/Adjustments/Levels or press Ctrl+L.
The above dialog appears. You’ll need the middle grey arrow under the histogram. Drag it all the way to the right, to meet its white counterpart. You can see that only the lightest areas remained visible, all the other hues in the upper layer turned black.
It is important that only the strong light sources remain. If some of the lighter building parts also stay visible, press B to switch to a black brush and cover these areas. Make sure you only leave the lamps, and perhaps the windows.
Mixed
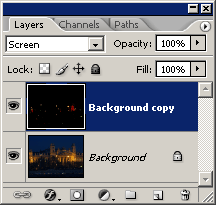
Now let’s mix the lower layer (containing the original photo) with the upper one (with the light spots). On the Layers palette, select the Screen blending mode.
You see the original again, without any changes? Good job! Soon you will see the point.
Star blur
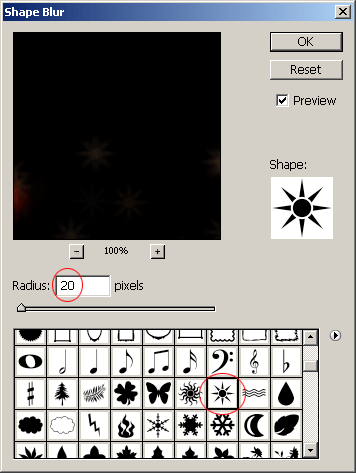
Filter/Blur/Shape Blur lets you put a blurred shape into the picture. Unfortunately, only Photoshop CS2 or above contains this feature.
Select the eight-pointed star (or sun?) shape from the bottom list. Set Radius to about 15 to 30 pixels, depending on the size of the light sources.
For high-resolution photos, you can use even higher values. Take care, however, to keep the star shape blurred enough. In too large pictures, you may spot that it is a clipart pattern and not a real glint.
You can preview the effect in the original picture all the time.
Twinkle, twinkle, little star

The star effect is finished. If you did the task all right, you’ll see nice light arms around the lamps.
If the effect is too weak, duplicate or even triplicate the Background Copy for strengthening. If it is too strong already, use the Opacity slider on the Layers palette for weakening.
