The noise removal tool in Photoshop Elements is very similar to that of Photoshop. Although neither of them is as advanced as purpose-built noise filtering plugins and applications, they can sometimes come handy as quick fixing tools, and most importantly, they’re extremely easy to use.
Load the photo in Photoshop Elements
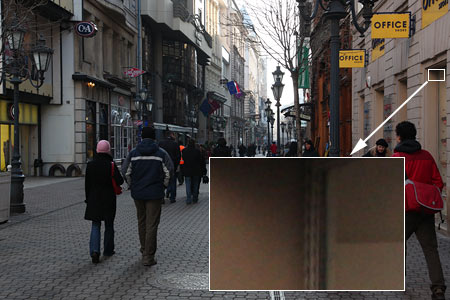
Surely all of you have already taken photos by a high sensitivity setting (ISO value). If not of your own will, then because of a low-lit, shadowy place and the automatic settings of your camera. When reviewing these photos afterward in 100% zoom on your monitor, the rain of colored spots and ash gray pixels can be really annoying.
Lurking in shadow

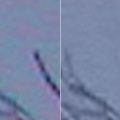
Those using a compact digital camera can be heavily affected by this issue, but users of dSLR machines can also experience it when using high sensitivity settings. Primary problem areas are dark, shadowed areas and homogeneous surfaces. When looking at a part of the picture above by a 200% zoom, noise can be spotted easily indeed.
The so-called color noise appears as reddish-greenish spots, while luminance noise as blurred gray, detail-killing pixels. One of the reasons for the blurs is the noise filtering software built into your camera, which had done some work ahead of you. Its results are far from perfect, however, so we have to touch it up using Photoshop Elements.
Three musketeers
Click Filter/Noise/Reduce Noise to display the noise filtering dialog. A part of the photo is visible in the preview area to the left. You should view the picture using at least a 100% zoom so that you can keep the filtering procedure in control.
The Settings region on the right contains the three most important sliders in the dialog.
I always adjust Reduce Color Noise first, since it doesn’t affect the blurriness of the details, just reduces the abundance of the reddish-greenish spots of color noise. It can have an adverse effect in smudging the rich colors of a picture, just like a washing machine would do. We had to use a 100% setting for the proper result, but you’ll have to check the effects continuously on the preview when determining the optimal setting for your photo.
Strength controls the intensity of luminance noise removal. Use it really carefully as it strongly blurs the details in the picture! Available values are 0 to 10, but be sure to check the results of every step on the preview to see how much of the details it would ruin.
You have an aid in preservation work though—the middle slider called Preserve Details. Drag it to the right to make more areas along the edges exempt from noise filtering. For picture areas containing many details, e.g. foliage, noise is barely annoying, as opposed to the blur caused by filtering. Set this slider to a higher value to make the filtering affect only homogeneous areas such as walls or a clear sky, where there are only a few details, but noise is easily spottable. After setting Strength, carefully increase Preserve Details to find the fragile balance between noise filtering and the preservation of picture details.
Left in background

Bring the mouse pointer above the picture to see the original state. I wouldn’t say the noise removal turned out to be perfect, but the tool keeps this unwanted phenomenon at bay acceptably.
If you need a more accurate, even if not-so-easy-to-use, tool, we recommend the NoiseWare, Neat Image, or Noise Ninja plugins.