No tricks, no strange retouching tools, whatever! We simply cut a piece of the photo and use it to cover unwanted parts.
Load the photo in Photoshop Elements
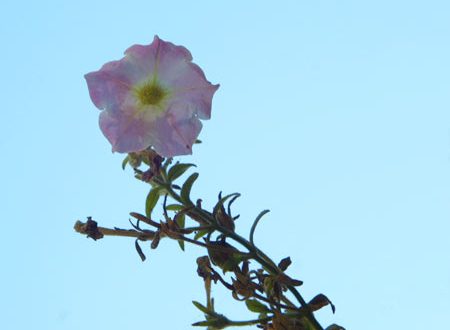
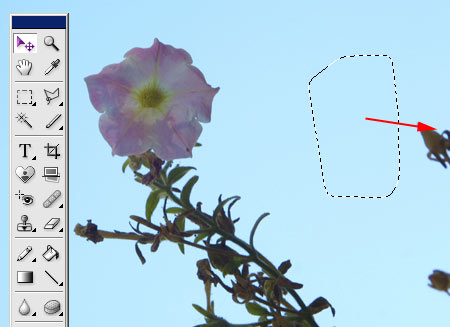
Today’s sample image shows some annoying plant parts intruding from the right. We could simply crop the right side of the photo, but what if we want to keep the size? This simple technique—of copying an area onto the annoying element to cover it up—comes handy in such situations.
We deliberately chose an extremely simple example—it is rather simple to make anything vanish from an almost completely homogeneous sky. The following method can also be used to cover up elements in front of irregular textures (such as foliage).
Let the Clone tool rest
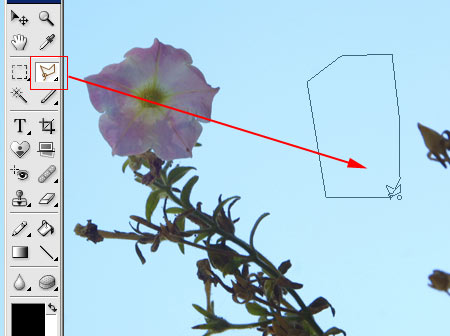
We do have a Clone stamp tool, but why bother if there’s such a simple method at hand? Leave Clone and Healing Brush for more complicated situations. Now choose the Polygonal Lasso tool instead (press L). Mark a nice large piece of the sky with it, much larger than the element you want to remove.
Keep in mind that the blue of the sky is not the same everywhere. There might be gradients. It is recommended to choose a nearby area with a similar lightness.
Don’t be rough!

Let’s soften the edges of the selection, so that the cloned area will fit into its new surroundings more naturally.
Right-click the selection and select Feather from the context menu. Specify a value on the small dialog that is displayed. This is the amount of pixels by which the selection edges will be blurred. The larger the selected piece, the higher value you can use. Usually a value of 5 to 20 pixels is appropriate. Click OK when you’re done.
Onto a new layer
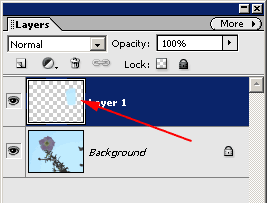
Copy and paste the selected area to a new layer by pressing Ctrl+C, then Ctrl+V. Now you can freely move it around.
Moving in
To do so, select the Move Tool from the Tools palette (press V), then drag the piece of sky with the left mouse button on top of the area you want to cover.
Clear as the sky

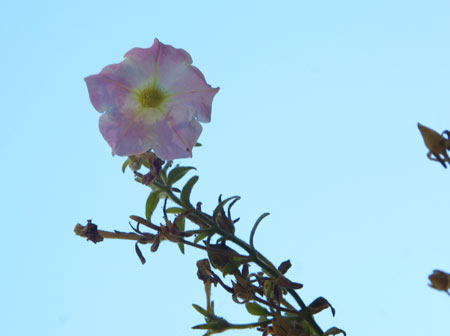
We repeated steps 2 to 5 with the lower intruding thing as well, so now there’s nothing more to annoy us on the right.
Click Layer/Flatten Image to merge the layers, and save the photo.