In an earlier article, we have introduced one of the easiest methods for applying a border around photos. Now we go a step further and explain another, slightly more complex method that provides more possibilities. Of course, even absolute beginners should find following the steps easy, so everyone’s encouraged to try this Photoshop tutorial and create a border that fits their own taste.
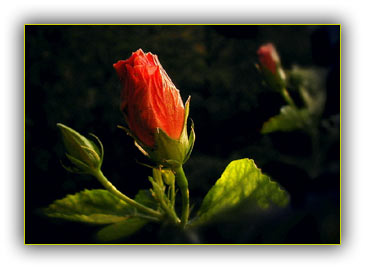
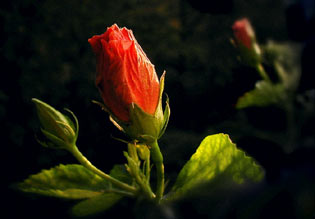
The picture we’d like to add a border to.
 Before you start, select the color you want for your border on the toolbar on the left. You can see the primary selected color in the upper box, and the background color in the lower one. The latter will be the base color of the border. Double-click either of the boxes to display the respective color picker dialog. The arrow icon on the upper right swaps the two colors, and the lower left icon restores Photoshop‘s default colors (black and white). In this example, we have left the default colors, so the border will be white.
 Select the whole picture (press Ctrl+A), then copy it to the clipboard (Ctrl+C).
Click Image/Canvas Size to modify the size of the picture’s canvas. You can see the Current Size of the photo on the appearing dialog.
Under New Size, set the height and width units to pixels, and set the numerical values to 10-20% of the current width. We have a small picture here, so we’ve used a value of 50 pixels, but for a 3-megapixel photo, you can easily set a value around 200-400. Of course, if you want a very narrow or very broad border, you can set different values.
Make sure Relative is selected and Anchor arrows are just as indicated, so that you get the same border on all sides.
Click OK to get a white border around the image. The basic job is done, and if you like what you got, you can stop here. We go a bit further into refining.
 Press Ctrl+V to paste the whole previously copied image into the center of the picture. You cannot see any changes but now you have two layers: Background contains the image with a border, while, above it, Layer 1 contains the original without one. We’ll be playing with this layer for a while. Right-click the name for Layer 1, and click Blending Options.
On this dialog, you can set various effects for the selected layer, e.g. shadowing, pattern or color fill, etc. Let’s create an additional narrow border and apply some shadowing to the inner picture.
Click Drop Shadow to apply shadowing. Leave all the settings on the right on default values, set Distance to 0, and experiment with Spread and Size to get a shadow that fits your taste. If you have Preview selected, you can watch the changes as you make them.
Now click Stroke. Set Size to the value you want as the width of the inner border. Leave Position on Outside, or set it to Inside. This way, the inner border will either display on the outside or on the inside of the layer. Color is red by default. You can change it by double-clicking the color box and setting a color for the inner border, but you can also hover your mouse pointer over the original photo to change it to an eyedropper that enables you to take color samples from the picture. We have taken a light green sample. If you’re done, click OK on the color picker dialog, and then on the Blending dialog, too.
Click Layer/Flatten Image to merge the layers.