We continue where we left off last time. Today’s work will be the adjustment of the slightly askew horizon. The method also demonstrates the usage of a new button in Photoshop CS5.
Load the photo in Photoshop

This is the photo we used the last time, somewhat lightening the darker areas. However, there’s still much to do with it. For instance, you can see it is slightly tilted to the right, which is much more annoying when viewing buildings than, say, portraits
We’ll be taking care of this using a new tool from Photoshop CS5.
Old and new

Well, this isn’t exactly a new tool, since we’ll be basically building on the good old Ruler Tool (formerly known as Measure Tool), which can also be activated by pressing I.
All you have to do is spot an edge in the picture which should be horizontal or vertical, and while keeping the right button pressed, drag a comparison line with the Ruler tool along this edge. This is how you specify the tilting degree of the image.
The button
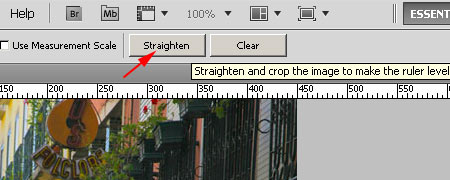
What’s really new is a button in the options bar of the Ruler tool. There are two of them actually, but now we need to focus on the first one. Click Straighten to have the picture immediately made straight. If the askew line was nearer to vertical, it will become vertical. That’s it. There’s no need to use other tools, such as the Image Rotation menu, after measuring. All is done in one click.
You can click Clear to delete the comparison line drawn with the Ruler if you want to re-specify it.
Two birds with one stone
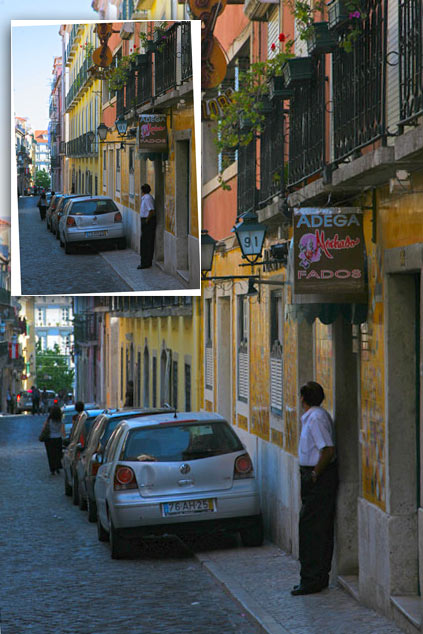
In addition, the new Straighten button saves you another step, since Image Rotation leaves blank areas without image information on the canvas (see the smaller image on the upper left). When you click the new button, Photoshop crops these unused areas as well.
This cropping has the slight disadvantage of losing some of the picture areas near the borders. This is necessary to have rectangle-shaped photos. But what if you don’t want to lose a single pixel and would rather clone something to the blank parts? Next time you’ll see…