Smaller objects are easy to remove from photos using different clone and healing brushes. However, larger ones can cause trouble as you have to work with a texture taken from a different area of the picture, and you may often fail to find a suitable one. The new content-aware fill feature takes the burden of searching off your shoulders and fills the selected area with many textures from the image more efficiently than ever before. If you insist, the feature can also take a guess about what could have been in a completely empty area previously. This is what we will try now.
Load the photo in Photoshop

Again, we continue where we left off. Last time we made the above photo horizontal by rotating it slightly. The semi-automatic rotation cropped some border areas which are now white. This means we have to discard some parts of the picture because of the cropping. But what if we reject doing so? We’d rather let Photoshop fill the white areas with something similar to the existing image content. If you want this done in a few minutes, the new content-aware fill is the only thing that can help.
Selecting the mist

First, select the white edges that Photoshop will have to fill. The Magic Wand tool is what you need. Just click each of the white areas and the contiguous parts are selected
Something of a problem
Sometimes something else may also become selected along with the empty border. In this example, it is the sky, being too light.
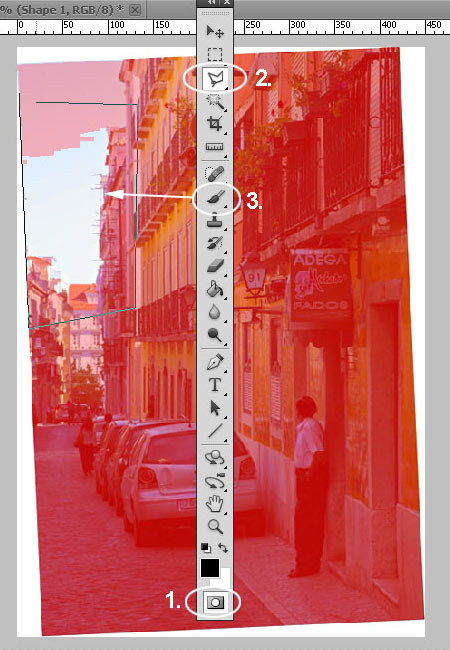
If you click Quick Mask mode (1) first, you can see the selected area in red. We used the Polygonal Lasso tool (2) to encircle the problematic area so that its left edge matches exactly the white border. Then we took the Brush tool (3).
Problem solved

Now you can easily paint over the problematic parts within the selected mask area.
Of course, if you had luck with selecting the white borders accurately, steps 3 and 4 are can be skipped.
Expansion
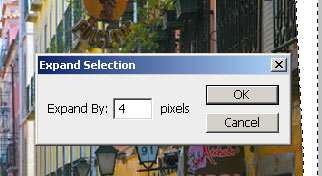
In the next step, slightly expand the selection by clicking Select/Modify/Expand. Specify an increase of a few pixels in the dialog that is displayed. For smaller pictures, 3 to 4 pixels should be enough. For larger ones, you can use 10 to 15 instead.
Gapless
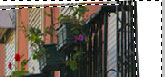
This is how the expanded selection looks. This will ensure that there are no gaps between the photo and the newly filled areas, and hopefully it will also make the fill more accurate.This is how the expanded selection looks. This will ensure that there are no gaps between the photo and the newly filled areas, and hopefully it will also make the fill more accurate.
Aware of content
Now right-click inside the selection and click Fill in the context menu. In the dialog, select Content-Aware from the upper dropdown and click OK. Photoshop does all the rest.
As you can see…
…it has done quite a good job with filling the hitherto empty spaces. What’s more, the content placed there fits its surroundings.
Post-production

If the fill turned out to be very inaccurate, try the procedure again but in step 5, specify a value of 1 to 2 pixels more or less. It is still better to start again than to click a thousand times while manually cloning the missing parts.
If you’re basically satisfied with the fill, but find a few flaws and unfitting textures, use the Clone Stamp or the Healing Brush for correction.