There are many possibilities for removing defective image areas in Photoshop. The most advanced one of them is Vanishing Point. Its usage requires a bit of practice, which you may just get over with if you follow this article.
Load the photo in Photoshop
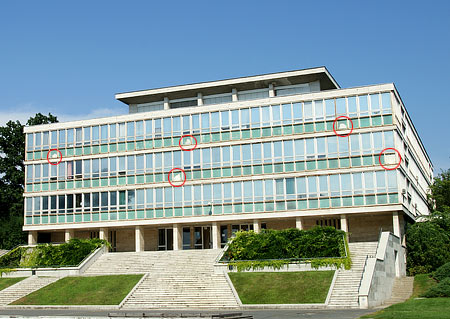
As you see, parts of this building need some refurbishing. These errors are easily correctible with Photoshop’s clone brush, for instance. You can take a sample from a similar but intact picture part, and copy it over the defective one.
Won’t fit
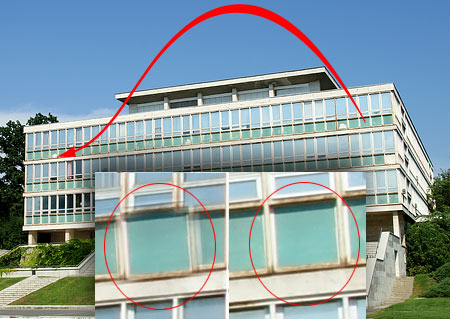
Well, it’s not going to be so simple. The picture above contains many repeating textures which may be suitable for cloning, but their size and orientation usually don’t fit other picture parts. For example, if you copy an intact area from the right side of the image to repair the error on the left, it won’t mesh with the regular pattern. Its orientation is different, and because of perspective distortion, it should also be smaller. After all, the traditional method can be used to correct these errors, but it requires an enormous lot of sampling and painting.
There’s a much sophisticated method called Vanishing Point which changes the texture according to the changes in perspective. The tool can be found in Photoshop CS2 and newer versions.
Perspective

Open the Filter/Vanishing Point dialog. This is a separate window which contains the tool buttons on the right, their current settings at the top, and the enlarged middle preview area on the lower left.
For the first time, do not change any settings. The selection button will be active. You can use it to select the perspective distortion of the area to be corrected. Click the four corners of the building’s facade. A selection grid appears.
Taking samples
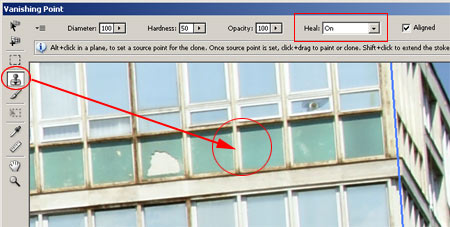
Now click the sampling tool button, which is the same as the clone brush on the standard tools palette. Diameter sets brush size, and Hardness specifies brush edge blurring. Opacity controls effect transparency. In this example, we kept all of these settings on their default values. However, in the Heal dropdown, we selected ON to make the clone brush behave as a Healing brush, i.e., in addition to those of the texture, it also takes into account the properties of the clone area. Leave Aligned selected so that the brush always takes a sample from an equal distance.
Keep ALT pressed while clicking an intact part of the building. By doing so, you take a sample from this area.
Cloning

Bring the clone brush pointer over the defective area to have Photoshop cover it with the sample. Click to apply the pattern to the area.
The sample can be transferred to other areas to be corrected. In all cases, the sample is taken from an equal distance according to the perspective and copied over the defective area. With a bit of luck, you won’t need to take more samples, the pattern will fit almost everywhere.
“Flawless”

With the least of dexterity and creativity, you can create the above result, and with some intuition, a much better one.