The next procedure is recommended for users of Photoshop Elements 7 or newer, since one main tool of this enhancement appeared first in that version. Another painting job, this time using a new, selective brush.
Load the photo in Photoshop Elements

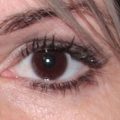
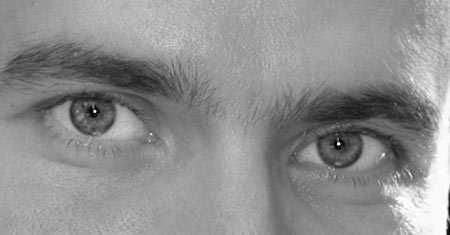
Choose a portrait photo in which you find the eyes too dark. Some contrast increase and lightening will be good for the gaze—and likewise for the picture. The photo can be color or black and white.
Selective brush

One of the novelties in Photoshop Elements 7 was the Smart Brush tool. Basically, it is a brush that paints changes onto the selected picture parts. You can recolor, lighten, darken a part, or increase its contrast.
After you have found its icon, keep the mouse pointer over it with the left button pressed, and select the Detail Smart Brush tool as it is more suitable for accurate painting. On the options bar at the top, click the rightmost image button, and in the dropdown, select the Portrait brushes. Among them, you’ll need the Bright Eyes tool.
Emphasizing the eyes
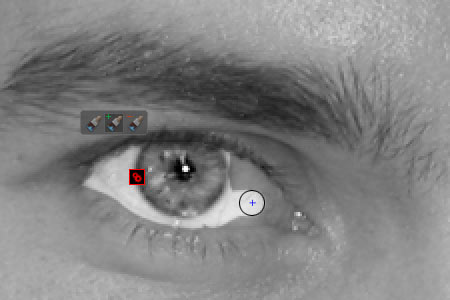
All you have to do is find a suitable brush size (using Size on the options bar), and carefully paint over the eyes. It will make that area lighter and increase its contrast.
In order to be able to work more precisely, zoom the image over 100% (on the Navigator palette). If you accidentally painted over areas which you shouldn’t have, select the brush with the – (minus) sign and restore those areas. The painted area can be expanded using the brush with the + (plus) sign. Paint over both eyes.
Softer edges

When selecting brush size, you can also choose a soft brush, but you may rather want to use a hard one instead and soften the area edges afterwards. This is necessary so that the modified area becomes less obvious and fits better into the picture.
The Refine Edge button is also on the options bar above. Click it to display a settings dialog with the above options. To blur the selection edges, increase the value of the Feather slider.
To see the results better, click the red Custom Overlay Color button below. This covers the image in a red mask, except for the selected areas. While softening the edges, you can use this feature to check how intense the brush effect will be in the various parts. Red areas will be exempt from it, while punctured parts will be affected totally.
Taking back
If you find the results too intense, switch to the Layers palette, which indicates that the selected area containing the eyes received a separate mask layer called Bright Eyes 1. To weaken the effect, simply click Opacity above the layer and set the desired strength using the appearing slider. The default is 100%, which we decreased to 60% in this example. This way, the gaze is more human, but still the effect of the procedure is quite at the fore.
A clear glance
The result is a glance much clearer, lighter and more cutting.