This week we have run into a very simple dilemma: the “problem” of resizing a selection box. It’s not so much as a problem than as a little exercise for the fingers for a few seconds. Still if you aren’t so comfortable about it, read this little Photoshop article.
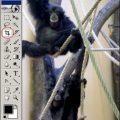
Load the photo in Photoshop

We’ll take the photo here as starting point and cut a part of it. Since we need a square picture part it is best to apply the basic Photoshop selection tools.
The most basic one

The most obvious tool is the Rectangular Marquee tool (the M key). Use this to select the area you want to cut.
Sizing selection

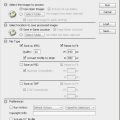
You can modify the selection box afterwards as well, namely with the command Select/Transform Selection. You’ll now have a frame with eight handles, which can be modified freely at the corner- and central points.
If you keep the Shift key pressed in the meantime, the modification will keep the size-proportions.
By pressing CTRL continuously you can create any concave square by dragging the corners one at a time.
As you like it

Here’s our unique selection box shaped by Ctrl. You can cut this shape (Ctrl+C) and paste it onto another picture (Ctrl+V), or you can just work on it in this picture within the selected area.
Related Photoshop Tutorials
- Selection I. in Photoshop
- Selecting the facial skin in Photoshop
- Selection calibrated to a hair in Photoshop