It is a frequent problem among digital camera owners that the colors are too dull on their photos. More diplomatic owners and product reviews call such colors “natural”. Even the simplest photo editing applications contain tools for color enhancement, and of course, so does Photoshop, too. However, if you want something more than the limited basic features, you have to rely on more complex programs. In this example, we use layers for increasing saturation. This method gives much more pleasant results.
Photoshop’s default tool for increasing saturation is accessible by clicking Image /Adjustments/Hue/Saturation. Now let’s put it aside for a while—we’ll be using it, but in a slightly different, more “professional” way.
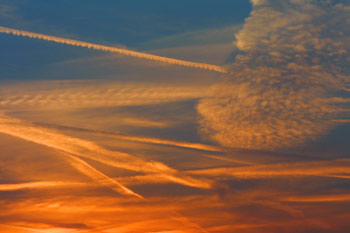
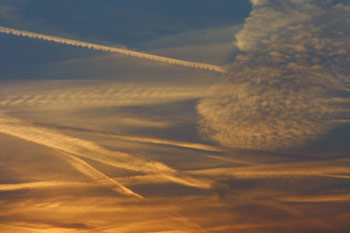
This nice sundown is even more colorful in our dreams, and we do want to see those dreamlike colors in the picture.
Instead of the simpler method described above, we now choose a more effective one: taking the advantage of Adjustment Layers. These are layers above the original photo layer that don’t contain any picture elements, just the desired correction adjustments. This way the correction can be used as a separate layer, therefore, general effect modes or opacity can be applied to it. Also, the adjustment can, by using a mask, be limited to certain areas while leaving other parts unchanged. But we won’t go so far right now. We’ll only apply a simple saturation increase on the whole picture.
Click Create New Fill or Adjustment Layer at the bottom of the Layers palette, and select Hue/Saturation from the menu.
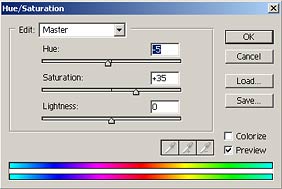
The appearing dialog is exactly the same that is displayed for the Hue/Saturation menu command. If you’re familiar with that one, you’ll find nothing new here. Let’s skip the details, and take a look at the settings.
The Saturation slider controls the amount of saturation. Drag it to the right for increasing and to the left for decreasing (towards monochrome). In the current example, we have boldly used a value of +35. To demonstrate how Hue works, we’ve offset that slider by -5. It shifts the general color effect of the image towards a particular color. The value we used, -5, gives a more reddish effect. Lightness, of course, controls the general lightness of the picture.
Click OK, and on the Layers palette you can see that the adjustments made by the Hue/Saturation command are represented by a new layer above the original. Set the general effect mode from Normal to Color to get a finer effect by color transitions. This way, even areas where such vigorous usage of Hue/Saturation would have resulted in annoying color noise will look more acceptable.
For additional refining, double-click the left field for the Hue/Saturation layer to display the previous dialog, along with your original, freely modifiable settings. Keep in mind though, as we have warned you, that the excessive increasing of saturation may produce unwanted color noise.
If you are satisfied with the result, click Layer/Flatten Image to merge the layers, and save your photo afterwards