Another example of layer style usage in Photoshop. This time we are going to place a writing on an a crumbling wall, then we will age it so that it matches the feeling raised by the wall.
Load the photo in Photoshop
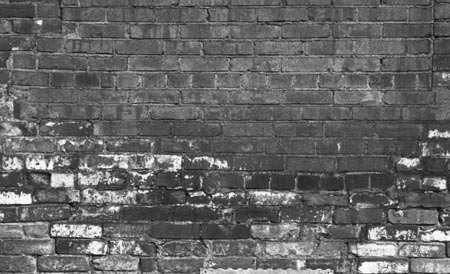
Find a battered-old brick wall or a moldy, crumbling concrete wall. That is, it should be a surface where a sign will not look out of place.
For the time being, it is out of place
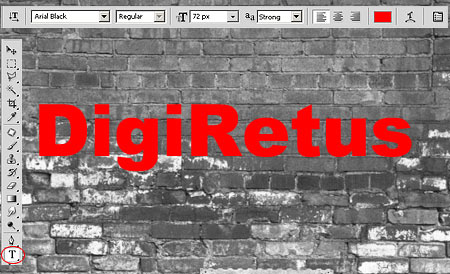
Select from tools Horizontal Type Tool (T key), then select a desirable letter type, size and color in the options appearing at the top.
Click on any point on the surface of the wall – where you wish to start the writing- and write the text of your choice. Now it looks as if it was printed on the photo, but we will make sure that it soon looks part of the battered wall.
As a Raster

For this, first we need to turn the vector text into a bitmap layer. Right-click with the mouse over the layer of the text, then select Rasterize Type from its menu. This way you get a conveyable bitmap layer, which can be blurred with the pixels of the stonewall below.
Stylish

We are still on the text layer, double-click on it and the layer style panel appears. At its bottom, you will find the control slides to make the pixels show-through. With its help, certain brightness ranges will see through over the upper layer from the other layer. You’ll mostly need Underlying Layer slide since our text is an even red one and this may cause that the rich texture of the bottom (wall) layer may see through the text here and there.
If you would like the white, moldy stains of the wall appear on the text too, push the bottom right slider to the left, if you want the dark parts among the bricks to come through, then push the black slide on the left to the right.
The result will be much better and natural if you push only half the slider instead of the whole one. This can be split in two and so the see-through can be regulated very well. Keep the Alt tab pressed down, then click in the inner side of the desired slider and push it like this.
Even more realistic
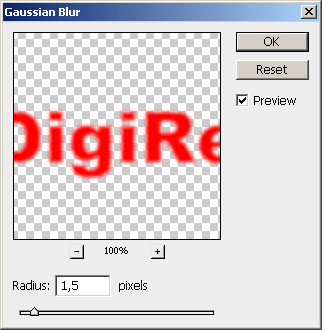
The effect will be more natural if you blur the edges of the text a bit. It will seem as if it was sprayed on the wall through a stencil.
Select Filter/Blur/Gaussian Blur effect and set a small amount of blur (a few pixels).
United

The end-result shows the text as if it was on the wall, and has been there for quite a while. The white mold shows though, it is a bit blunt and the unevenness of the wall are also apparent.
Unite the layers using Layer/Flatten Image command and save the picture.