Save and Import
Two Photoshop Touch lessons are behind us already, which have taught us to carry out some basic picture adjustments and then save them in PS Touch’s own gallery.
Here’s, for example, the blue rose we made last time, which can be automatically loaded from the gallery when you open the software. Saving a picture in the gallery is offered automatically in PS Touch before you exit, but if you have finished adjusting a photo and you’d like to save it, you can also do it by using Done icon in the upper row.
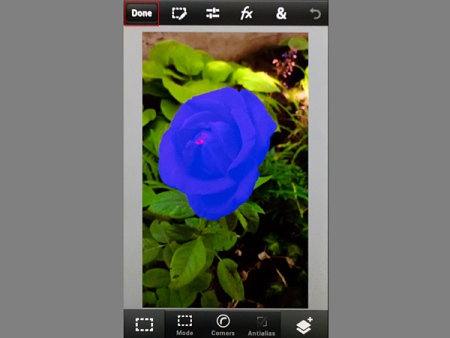
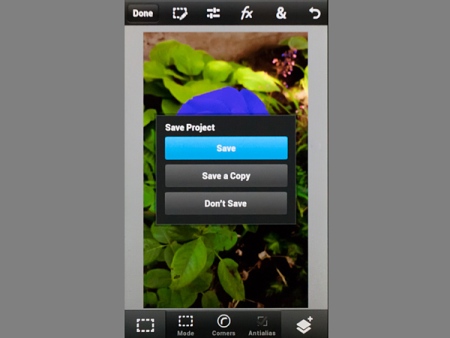
If you click on Done icon, a small window appears showing three options.
First, you can save the image in Photoshop gallery (Save), second, you can save it under another name (Save As), which is useful if you made new changes and don’t want to overwrite the previous version. Third, you can cancel the save command (Don’t Save). After using any of the three buttons you’ll get back to the software’s own gallery, where you can browse among the previews of all the modified pictures.
What if you want to save in the external picture gallery of the telephone or tablet, or even if you want to share on the internet?
There are options for these too, in the internal picture gallery. Before importing into an external gallery, click on the spur wheel icon in the top left corner. Here you can set the size of the imported photo (Image Import), which is 3 megapixels by default but can be 10 even.
The icon next to it will open a menu, which helps you create a new importing gallery that you can name whatever you like (Create Folder).
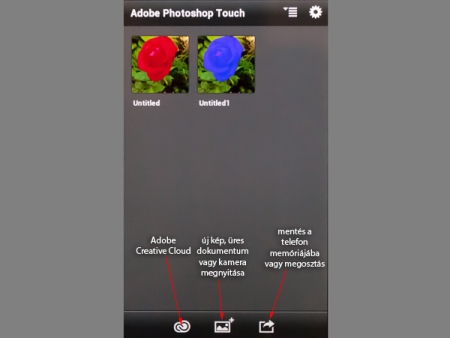
Saving or loading the pictures can be done with the help of the bottom three icons. The first one pens the online cloud services of Adobe Creative Cloud. The second opens a new picture from an external source, let it be taken freshly by the camera of your phone even. The third is a pool of importing commands.
Touch the third icon to be offered the following three options:
Upload to Creative Cloud: The ready photos listed above can be loaded to their web-based place in Adobe Cloud (if they have such a place).
Save to Gallery: The selected ready photos can be exported into an external picture gallery.
Share: The selected pictures can be shared through one of the online file sharing sites (or another cloud service).

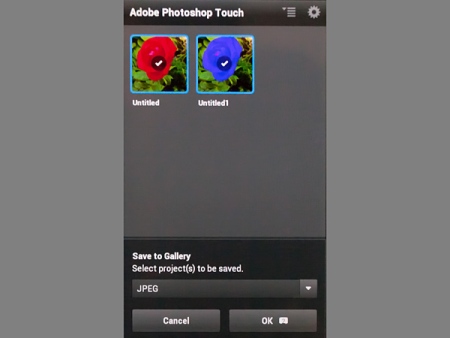
Touch any of these and a window appears at the bottom where you can select the imported picture format. If saving in Adobe Creative Cloud, it can be Photoshop Touch’s own .PSDX format, or in other cases JPEG or PNG file format.
Having selected the format, now select the photo(s) you want to import. Simply touch them, and the software will regard them as selected.
Importing can be launched with the bottom right OK button, which will also show the number of the selected pictures.