As we have mentioned in an earlier Photoshop tip about this topic, your possibilities with borders are practically unlimited. To put it better, the only thing that limits you in applying borders of various colors and shapes with different methods is your fantasy. The two previous tips introduced sharp-edged borders. The current one is about a soft, transitional border that can be transformed into several border effects with a few clicks by using various general layer effect modes.
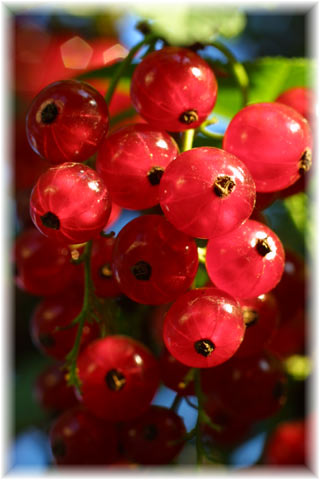
Choose an appropriate photo.

Press Ctrl+A to select the whole image. Click Select/Modify/Border, and on the dialog, set Radius to 10-20% of your picture’s width.
In fact, this value almost doesn’t matter at all, we’re just helping you with an approximation. If you want a very thin border, use a lower value. Of course, you can also use higher values for broad borders.
The sample picture is 320 pixels wide, so Radius was set to 15 pixels.
The border area has been selected. Now we’ll copy it to another layer.
Press Ctrl+C to copy the border to the clipboard. Press Ctrl+V to paste it onto a new layer. On the Layers palette on the right, you can see that you’ve got a new layer.
Make sure it remains selected and click Image/Adjustments/Levels. Drag the black arrow on the left of the appearing dialog to the right as needed, as indicated by the arrow. The more you drag it to the right, the lighter the border will be. We’ve dragged it all the way to the right, so we got a nice light border that produces a soft transition effect inwards.
You can play on with the border by trying out the various general effect modes on the Layers palette. For example, choose Dissolve instead of Normal to get a grainy transition.
When you’re ready, click Layer/Flatten Image to merge the layers.