News | Articles | Books | Links |   Digiretus.hu |  Digiretus.ro| RSS
PS Elements|2010.08.28.
Photoshop Tutorials|2010.08.15.
Photoshop Tutorials|2010.08.07.
Photo review|2010.07.29.
Photoshop Tutorials|2010.07.11.

Sharpening II in Photoshop Elements

level: advanced


A custom filter for the professional and the brave.


Content-aware fill in Photoshop CS5

level: advanced


One of the most fascinating new tools in Photoshop CS5


Cropping photos II

level: Very easy


Cropping an elliptical (oval) shape


A portrait and the Parliament


Our review stream has reached the letter 'P', so for today, there's a portrait and the Parliament. There isn't anything more to connect the two, apart from Balázs Turay's thoughts.


Horizontal horizon in Photoshop CS5

level: Very easy


A new button for adjusting tilted images


Which photo editor do you often use?

Photoshop
GIMP
Photoshop elements
Paint Shop Pro
other software
nothing


Search this site


PS Elements|2009.01.07.

Pastel crayon effect in Elements

level: easy


Realistic drawings without artistic skills


Free Photoshop Tutorials: Applying borders IV.

Version: Adobe Photoshop 7.0 +


level: easy

Let’s take a look at another tip about a neverending topic—bordering. This time we want to generate a passepartout-like, 3D-ish effect around the photo. Once again, we invoke the help of duplicated layers and layer styles. It won’t be that difficult!

Advertisement
 

Printer-friendly version

Free Photoshop Tutorial - Applying borders IV.


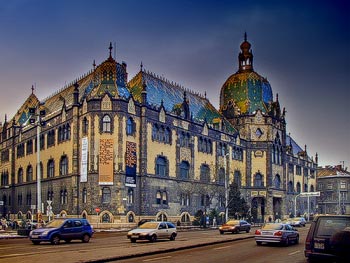
Open the photo for which you want to make a border.

Free Photoshop Tutorial - Applying borders IV.

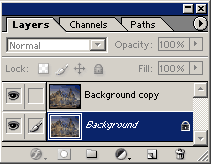
Click Layer/Duplicate Layer to duplicate the original layer. Select the lower background layer as indicated in the picture below.

Free Photoshop Tutorial - Applying borders IV.

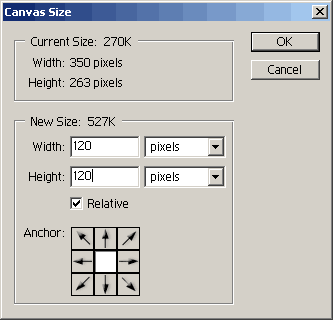
Click Image/Canvas Size and select the Relative check box on the appearing dialog. This way, the program takes the original photo size as a basis and adds the specified border height and width to it. This will produce a frame of the background color (white by default). Type the same value into the Width and Height fields. These will be the border's height and width in pixels, so set the unit of measurement to 'pixels'.

Free Photoshop Tutorial - Applying borders IV.

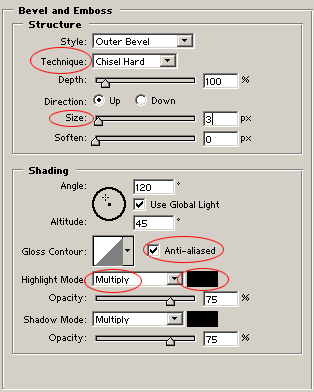
You can already see the simple border around the photo. Now, we want to put some kind of passepartout-like embossing on it. Select the upper layer on the Layers palette, and click Layer/Layer Style/Bevel and Emboss. Specify the following settings on the dialog. For a broader embossing, set a higher Size value. The lighting of the border imitating the 3D effect can be changed with Angle.

Free Photoshop Tutorial - Applying borders IV.

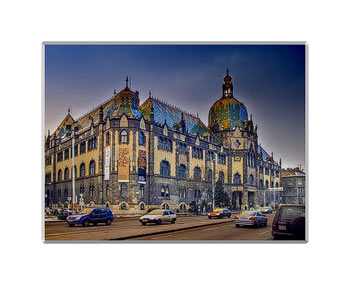
Finally, click Layer/Flatten Image to merge the layers, and save your photo. Here's the result.

Free Photoshop Tutorial - Applying borders IV.

Related Photoshop Tutorials:

Free Photoshop Tutorial: Applying borders I.
Free Photoshop Tutorial: Applying borders II.
Free Photoshop Tutorial: Applying borders III.

Free Photoshop Tutorial: Applying borders V. (hungarian)


Impressum
| About us

© nEtural webdesign 2006.
All rights related to the free use of any pictures, sounds, written material and graphical elements published on the web site are reserved by the site owner. The owner's approval is required for the use of such published elements.