Our fourth Photoshop tip on sharpening relies on the helping hand of layers and general effect modes. Once again, the concept is to produce as little side effects as possible and to have a greater control over the procedure than what Photoshop’s standard sharpening tools allow. Although the procedure is rated as advanced difficulty, we encourage beginning users to try and save it. It won’t be that difficult!
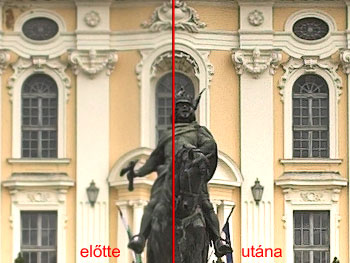
The photo excerpt below will be the subject of this tip. It has been taken from a picture of the original size. The details can be seen well but are a bit too soft, so they need some sharpening.

Duplicate the original layer by clicking Layer/Duplicate Layer, and name the new layer in the dialog that appears. It could be e.g. ‘sharpen1’.
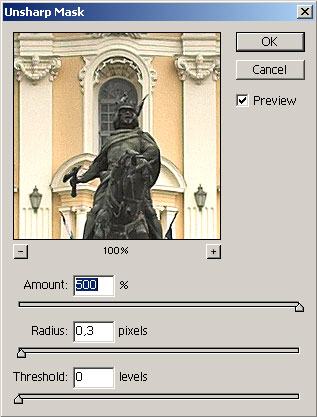
Apply the Filter/Sharpen/Unsharp Mask filter on the new layer to sharpen it. Apply slightly more sharpening than needed so that the edges become hard and contrasty. It looks a bit unpleasant, but we’ll refine it later. We have used 500% for Amount and 0.3 for Pixel to oversharpen the photo.
Before making the layers transparent, duplicate the sharpened layer again (Layer/Duplicate Layer). Name it ‘sharpen2’. Set its general effect mode from Normal to Darken, so that only the dark areas of the edge contrast will apply. Switch back to the middle layer and set the general effect mode to Lighten. This makes only the light areas of the edge contrast effective.
All you have left to do is to decrease Opacity for ‘sharpen1’ and ‘sharpen2’ to values that produce an appropriate final sharpness. Once again: Decreasing opacity for ‘sharpen1’ refines the lighter edges, while doing so for ‘sharpen2’ does the same for darker ones. Most of the time, the dominance of light edges is more annoying, so it is recommended to set it to a lower level. Of course, the proper value depends on the actual photo, the extent of sharpening applied and your good taste. You can easily watch the effect of the changes on the photo while dragging the Opacity slider. We have applied Opacity values of 45% for ‘sharpen1’ and 80% for ‘sharpen2’.
If you’re unsatisfied with the result, experiment boldly with various opacity settings. When you’ve reached the desired state, click Layer/Flatten Image to merge the three layers. Finally, save the photo. In spite of the oversharpening, the result you have produces a finer sharpness and is more controllable. We also managed to conjure up some noise, but luckily in such an extent it doesn’t present an issue.
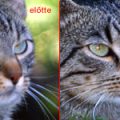
Before / After