We have earlier published a Photoshop tip titled “Lightening shadows” The problem is the same here: to deal with broader dynamics ranges in a photo. Too dark and too light areas can often dominate a photo. We’ like to see more details – under – the shadows, or repair some of the bleaching. Now we try the “mysterious” Apply Image command. This is a rather obscure option although it can come handy by a number of different editing methods, so it is suitable for multiple purposes. For example, the one we are trying to accomplish right now.
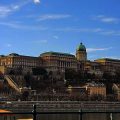
Open the photo in Photoshop
We’d like to lighten up the shadowy areas of the photo while preserving the ratio of highlights (the lightest parts). In fact, we’ll try to decrease this ratio a bit.
Double layer
Drag the original layer called Background upon the indicated icon to duplicate it. You can also click Layer/Duplicate Layer instead.
Make sure the newly created layer called Background copy is selected, and set the general effects mode from Normal to Luminosity so that the general effect of the colors won’t differ between the layers, only that of lightness.
An obscure feature
Click Image/Apply Image and set the values as indicated above. Make sure that Channel is set to Green for both Source and Target, and select Invert for Source. Set Blending to Exclusion.
Apply Image will only affect the second layer. It subtracts the green channel from its own inverse, so that dark areas get lighter, while light areas get a bit greyish.
Opacity
You can set the relative ratio of the two layers using the Opacity slider. By decreasing the percentage value, you dampen the effect of the change made on the upper layer. We have decreased it to 80% but you won’t necessarily need to do so every time.
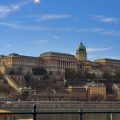
Here’s the result!
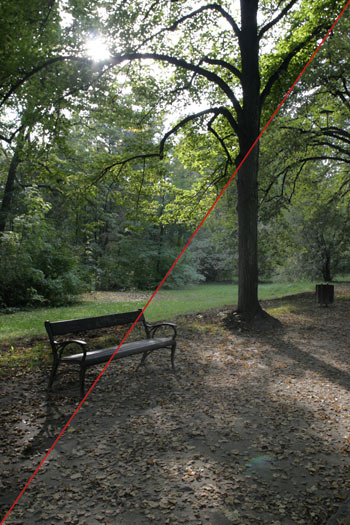
The upper left area shows the original state while the lower right displays the modified one. You can see more details on the shadowy areas, and the strength of light areas have diminished. If you want an even more dramatic effect, duplicate the upper layer again, and set Blending for the new layer to Screen, then set Opacity to a value you like, just as in the previous step.
Finally click Layer/Flatten Image to merge the layers. Save the image, and you’re finished.