Oh yes, we know there’s a Film Grain filter in Photoshop that emulates the effect by two clicks. But we think it doesn’t look nice enough; it alters the picture too much, and anyway, who’d read an article about “set it and click OK”? So we get back to our good old friends, the layers, and sprinkle the photo with a handful of grains that can be refined after applying.
Open the photo

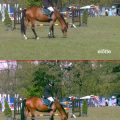
This is the picture we want to imbue with the grainy effect. As Photoshop’s Film Grain filter can affect shadows and lights too rudely, we use it on another layer.
A grey layer
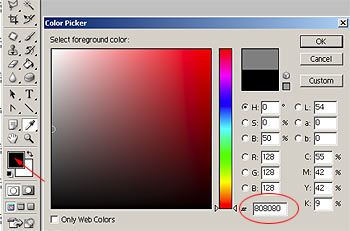
Click Layer/New/Layer to create a new layer. Fill it with a middle grey color. Double-click Foreground Color on the Tools palette (indicated by an arrow) to do so. On the Color Picker dialog, type 808080 into the indicated field.
Filling
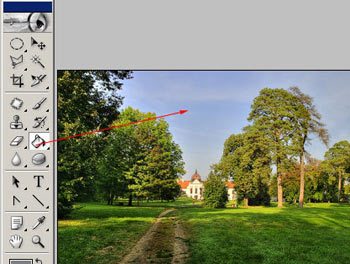
Click the Paint Bucket from the Tools palette. It now contains middle-grey paint. Click somewhere in the picture to make the whole layer grey.
Grains, grains, grains
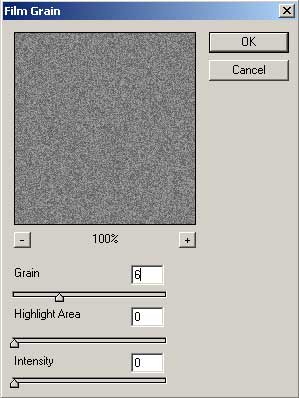
Now we apply the grainy effect to the grey layer. Click Filter/Artistic/Film Grain. On the dialog, you can specify the extent of graininess with the Grain slider. Lower values produce finer results. Highlight Area and Intensity don’t affect the picture in this case (when dealing with a middle-grey color), so leave them be. We have set the top slider to 6. The proper value can depend on the size of the picture. For an image composed of many pixels, you can set it higher as it will look more authentic when printed on paper.
Layers interacting

You have to blend the two layers to reach the desired effect. Set the blending mode to Overlay from Normal. You can also choose other modes, e.g. Soft Light produces a more withheld result. Overlay doesn’t change the lightness of the photo, just makes the grains visible. Set Opacity to refine the effect.
The contrast you want

Click Layer/Flatten Image to merge the layers, and save the photo afterwards. An earlier tip called “Film colors” helps you produce an even more film-like illusion. Grains look better on black-and white photos with a strong contrast. If you don’t find Film Grain’s effect good enough, try the Virtual Photographer plugin by OptikVerve Labs.