One of our favorite tools for color correction is Selective Color. As its name tells you, it can be used to manipulate a selected color group without significantly affecting other colors. It allows almost every such change, but is particularly handy when you have to change certain colors, for example when your camera gives yellows a slight greenish tint. It’s child’s play to restore the original colors. You only have to read this Photoshop tip.
Open the photo in Photoshop
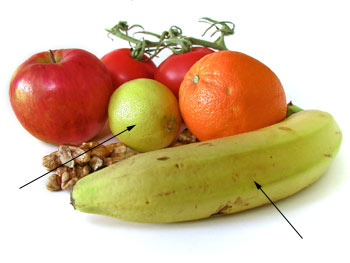
The picture features some pretty under-ripe fruits as well. We want to replace that greenish yellow with something more vivid.
Selective colors
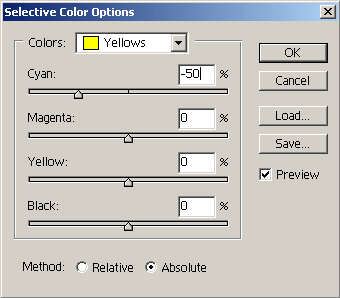
You can find the function under Image/Adjustments/Selective Color. You can choose the color group you want to manage in the Colors dropdown at the top of the dialog. This time, they’re yellow and its close relatives. So, click Yellows, indicated by a yellow square. Surprise. After selecting Yellows, the changes you make on the dialog’s sliders will only affect yellow and similar colors. Cyan affects greenish and blueish hues, Magenta is responsible for reddish and purplish ones, while Yellow for yellows. Black saturates or bleaches the selected hue. Before you make any adjustments, choose Absolute under Method.
As you want to eliminate the greenish tint from your yellows, drag Cyan to a lower value. A value of -50 worked well for us.
Back with the others!
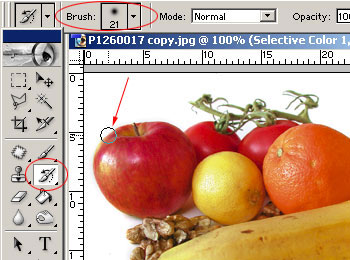
The color correction might affect other hues of the picture more or less significantly. As certain hues of red (e.g. orange) are close to yellow, they may fall victim to such a change. Choose History Brush from the Tools palette, and select a soft brush of an appropriate size. In our case, it was size 21, but you can safely use larger brushes for larger photos. With the History brush, paint over the colors you have changed inadvertently.
Ripe fruits
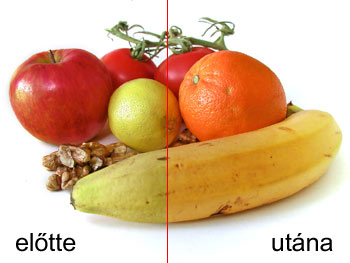
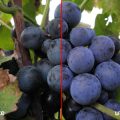
before / after
All you still have to do is to save the photo. The change is obvious. Try the effect on other colors! The sky is too greenish in a future photo? Grass has a tint of red? Fear not! Selective Color helps you deal with all those similar problems.