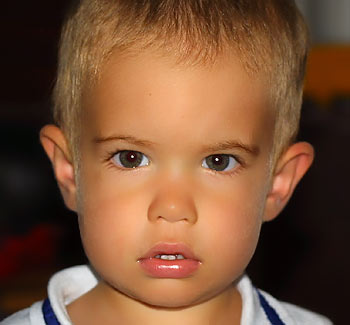
Did you know that the most efficient tool against freckles is not powder base but the red color channel? If cosmetics companies knew this, they’d surely be investing into image editing software instead of all those creams. Seriously speaking, you can eliminate the freckles from a face without significantly damaging the photo. You just have to use the color channels.
Step 1: Open the photo in Photoshop

Freckled facial skin sometimes does looks good. However, it doesn’t really fit a glamour photo. The greatest problem is how to make the freckles vanish. In an earlier photoshop tip, we have tried a blur. It is rather efficient against skin defects, but applying a strong blur lends the model a china doll look that’s not always attractive. Now we want to preserve the natural marks and structure of skin without freckles and pigment spots.
Step 2: Double layer

Yes, once again.
Duplicate the original layer by clicking Layer/Duplicate Layer. The main changes will be applied to the upper layer so that certain properties of the original photo can be restored from the unchanged one.
Step 3: Making ‘em run…

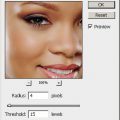
…like an army in retreat. Well, not perfectly like that, clicking Image/Apply Image works way better than troop-carrier vehicles. On the Channel dialog, choose the Red color channel, and set Blending to Lighten. Leave all other settings unchanged.
Step 4: Another blending mode

On our new layer, the model has a nice freckle-less skin, but where have all those colors gone? Set the blending mode for the two layers to Luminosity. This lets the colors of the lower layer appear but also retains the lightness (luminosity) values of the upper layer. If you want bring back something from the lower layer and the freckles, try fiddling with the Opacity slider. If the face became too pale, try Image/Adjustments/Levels or Curves to reset light levels to something near the original.
Step 5: Spotless

We can say goodbye to freckles while retaining the natural structure and look of facial skin. If you want a cosmetics ad-like look, use the procedure mentioned above, from an earlier tip. Stay tuned as we’ll also show you how to emphasize the model’s eyes.
The next section of the article is read here: Smoothing out faces III. in Photoshop