In an earlier Photoshop article we have already discussed this topic: how to make the color veil on a photo disappear. Of course, there are lots of solutions. The most obvious ones include the menu functions Variations (introduced earlier) and Color Balance (discussed below). Color Balance has extremely easy-to-use controls. The only task is to decide according to your taste, which option to use and to what extent. Well, here we go. It is a comfort, however, to know that you have almost infinite possibilities to experiment, and almost any mistaken steps can be undone. As we want to stay true to our style, yet again we chose a picture with a statue.
Open the photo in Photoshop
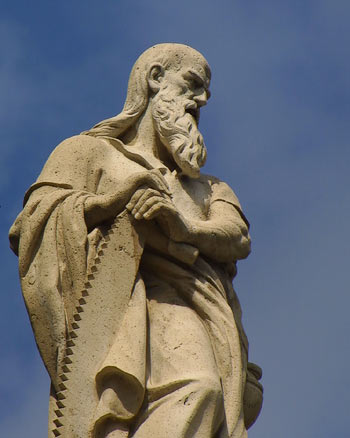
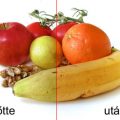
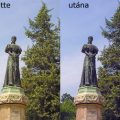
The image is covered by a green-yellow veil. The statue could even bear it as it lends a pre-sunset effect, but the sky got strangely pale and lifeless. We have to do something!
Color balance
Click Image/Adjustments/Color Balance. The appearing dialog will look like this.
Color Levels specifies the values for each color channel from -100 to +100. Ratio of the channels can be set with the sliders. All the colors are paired with their opposites, so that strengthening one weakens the other. The pairs are Cyan-Red, Magenta-Green, and Yellow-Blue.
Tone Balance contains three radio buttons and a check box. The radio buttons are for selecting which lightness interval the upper settings should apply to. The intervals are called Shadows, Midtones, and Highlights. Preserve Luminosity keeps the luminosity values unchanged.
First, select Midtones, and increase Blue (thus, decrease Yellow) on the third slider. We used a value of +20.
Same thing twice more
Apply the same setting after selecting Shadows, and then Highlights. Use the +20 value for Blue every time.
Preserve Luminosity increases contrast of the image. We switched it off to change only the colors.
Unveiled
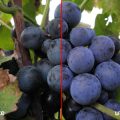
After
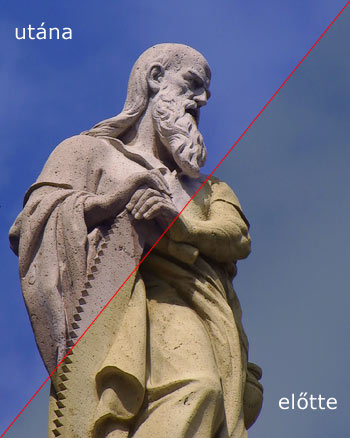
Before
Well, the change certainly catches the eye. The green-yellow veil on the statue has gone. We tried to preserve the sun-lit character of the photo, so the statue still bears a slight yellowish tint. For a cooler color effect, shift the Cyan-Red slider a little towards Cyan in each interval.